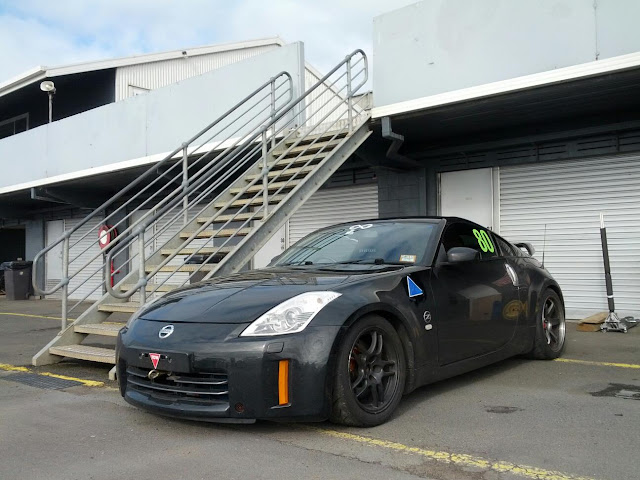
Sunday, December 30, 2012

Nismo GT LSD Pro 1.5 Way

Time to get a little more serious, so I purchased one of these - a Nismo GT LSD Pro 1.5 Way. The kit is very comprehensive and contains everything to make installing it as smooth as possible. Along with the LSD, you get replacement ring gear bolts, side bearings, oil seals, washers for the drain/filler plugs, differential fluid; and most notably, side flanges (which appear to be two right hand side OEM flanges).


With an install of this magnitude, I enlisted the help of my friend +Dan, the master mechanic. A guide on how to install the LSD can be found here, so I'll just show a few photos. Here, the OEM diff and housing has been removed from the car.


It was then transported in the back of Dan's green FTO in Lancer's clothing, scrubbing all the way to a secret location...


...


Here, we set about using the air tool to do the hard work.


 The diff housing cover was removed first.


This is the OEM viscous unit.


With the viscous unit removed from the housing, it was time to remove the ring gear. This will be reused on the new LSD.


Ring gear is off...


The inside of the housing and ring gear were given a good degreasing. The old gasket goo was also cleaned off the rim of the housing.


The ring gear is all clean, ready to be attached to the Nismo LSD behind it. The bearings have also been pushed on to each end of the LSD.


Carefully bolting the ring gear on with a mallet.


Then tighten the bolts with the air tool.


The bolts were torqued to spec as well.


Carefully lowering the LSD (with bearing outer races attached) into the housing.


It was a tight fit, but it has to be. After some struggle to get the LSD into the housing and have everything bolted back together, I didn't take any more photos. It was simply a matter of bolting everything back together in reverse order of how it was dismantled. I left the initial torque setting of the LSD in the middle setting.


With the new diff installed and bedded in, my initial impressions are that it locks strongly and provides very good feedback about the grip available mid corner when provoked. I seem to also be able to point the nose of the car better mid corner compared to using the OEM diff. Now I wait for a track day to really test it.

Monday, November 26, 2012

Monday, October 29, 2012

Wednesday, October 24, 2012

Tuesday, October 23, 2012

Exe Crew Track Day - Winton Motor Raceway

21st October 2012

It was time to return to Winton again, the track where I have cut the most laps out of all the tracks that I have visited. The goal for this track day was to catch that elusive 1:40.xx lap and join Silas in doing a 40 with an NA 350Z.

The day looked like it was setting up to be perfect for a track day, with a relatively clear sky. So, down to business...

Session 1
My friend Robbie came for a ride for the first session. The track felt good, grip was coming up and confidence was building in the car.
2:02.7470 1:56.7810 1:46.3990 1:41.6130 1:42.2510 1:41.9210 1:42.2410

Session 2
I went out alone, time to get to work. After stringing together a couple of 41s I finally broke into the 40s, a new PB.
1:56.5690 1:46.1970 1:43.7630 1:41.0140 1:41.5700 1:40.9530 1:41.6020 1:40.7430

Session 3
I attempted again to beat my new PB, but wasn't successful. I felt that the track had gone "off" by this stage. It was slippery probably because it was getting too hot and dirt was being brought on by cars going off.
1:56.8090 1:41.7050 1:46.1610 1:41.6920 1:45.2070 1:44.2370 1:43.4040

Session 4
By this stage, it was well into the afternoon and I could only manage 41s. The track was just too slippery.
1:54.1490 1:45.6660 1:42.9060 1:43.0560 1:42.4160 1:41.5110

Session 5
1:54.4100 1:43.3840 1:43.4690 1:43.8130 1:41.6650

Session 6
Dan 1337 was passenger, so this session was just a few happy laps before ending the day.
1:52.9430 1:41.8410 2:02.8710 1:43.0430


Compared to my previous best lap it looks like overall, I found time by getting higher speeds before braking for corners. Some were achieved by braking later and some by getting on to the throttle earlier on exit of the previous corner.


Looking at the theoretical best lap (1:40.08 - the brighter yellow line) comparison, the gains are to be had by going through the S corner (turns 10 and 11) some 10 kph faster.

Here are some photos I pillaged from Charlie, Robbie and Mellow. Thank you!


Finally, a big thank you to all Exe Crew for the effort they put in to make this one of the best Winton track days yet. Thanks also to all participants for your great on and off track behaviour, it made for a very smooth day.

Saturday, October 6, 2012

More serious brake cooling - Part 3

Following on from part 2, I fitted some new longer ducting that I purchased. The old one was too short as I had originally planned to route it in from of the suspension. So off the front bumper came again and the new hose went in. Five hours later and both left and right sides are done...


Next, I drilled some holes in the dust shield so that the air is directed towards the center of the rotors into the vents. I do not want the air hitting the rotor face as that will create an uneven cooling effect compared to the outside rotor face. The holes may be too small, but I'll test it like that first.


Sunday, September 23, 2012

More serious brake cooling - Part 2

Continuing on from part 1, I went about building brackets to hold the ducting near the rotors. JimJim helped me to fabricate some brackets using his engineering prowess.


The finished brackets...


Jim fitted the brackets and this was when we found that the idea to route the duct in front of the strut was a big fat fail.


When the front of the wheel was turned in, the duct would be crushed against the suspension. The cost of this lesson: Approximately $4 in bracketing material and Jim's time and effort.

So back to the drawing board for a solution to route the ducting to the rotors. Naturally, the next option to explore was to place the ducting behind the strut. After some searching on the web, I found some pictures of a 350Z that had brake duct work done and it was routed behind the strut. I got the idea from that project of how to build a bracket. So with all that in mind, I purchased some 0.7mm thick galvanised steel and cut it to shape.


After some bending, drilling and filing, I finished building the right hand side. Here it is with some ducting I was using as a guide.


Below is the ducting touching the brake fluid hose when the front of the wheel is turned outwards. I'll need to wrap the brake fluid hose with some cushioning material.


What remains to be done is to fit some new longer ducting and connect it to the new brackets. I'll also need to drill a hole in the dust/heat shield behind each rotor to allow air from the ducts to the rotor centres.

Friday, September 14, 2012

ASP.NET MVC form submission with link

While learning about ASP.NET MVC and whether it was possible to use an HTML anchor tag to trigger an HTTP POST request (I didn't want to use a button), I came across this interesting post about the pitfalls of using links for deletion of data:
http://stephenwalther.com/archive/2009/01/21/asp-net-mvc-tip-46-ndash-donrsquot-use-delete-links-because.aspx

It's worth knowing, and this issue highlighted is in a similar vein to SQL injection in URL's.

The intended operation for the link I was creating was to update a database record, so the consequences of using a link are similar to that of a delete operation via a link. In the end, I opted to trigger a form submission via javascript:

@using (Html.BeginForm())
{
    <p>
        <a href="javascript:document.forms[0].submit()">Yes</a> |
        @Html.ActionLink("No", "Details", new { id = Model.Id })
    </p>
}

Tuesday, September 4, 2012

Phillip Island Circuit Weekend


The weekend just passed (1st/2nd September 2012) was epic, it consisted of my first back to back track days. After initially only planning to attend the Sunday's sprint event at Phillip Island, I was persuaded by Ying to drive on the Saturday practice day. That decision was one of the best that I have made this year. Back to back track days afford you the opportunity to spend the time on the first day to really get to know the circuit again and experiment with what works for the best lap time, then really put it into practice on the second day.

Day 1 - Circuit familiarisation
Having not been to Phillip Island for about 9 months, it was time to attempt to put what I had learnt into practice. As there was no official timing on the Saturday, I will use the times recorded by RaceChrono.


My first session out, I managed to get a new best time of 1:57.7; I was on the right track (no pun intended). As the day went on, my best lap time progressively dropped as I kept trying to brake deeper into turn 1, maintain more speed through sweeping corners and hold the throttle as close to flat as possible through turns 8 and 12. After speaking with Adam, I also managed to hold the throttle flat through turn 3. At the end of the day, on the final lap of my final session, I clocked a new best time of 1:56.5. I had achieved the theoretical best (TB) time from the results of my previous outing to Phillip Island. However, my new TB was now 1:54.9! My new-found knowledge would have to wait until day 2 to be applied, but I was already happy with the 56.

Some happy snaps...
Ying's MX-5, my 350Z and Viv's WRX

The GorillaZ, like a pig in mud

Jim performing some checks on his Evo 9

Some seriously fast cars in my group, not including mine...

Day 2 - Phillip Island Auto Racing Club (PIARC) Sprints
After a fairly good night's sleep, it was Sunday and that meant getting down to business. With the track theory fresh in my head, I concentrated on smoothness and applying throttle as early as possible and as much as possible. Throughout the day, I was also able to brake even later into turn 1 and managed a new best VMax of 226 kph. However, what surprised me was that my lap times continued to drop in the first few sessions.

Session 1
2:19.3049 2:02.7255 1:58.7144 1:56.4295

Session 2
2:11.9757 1:57.2711 1:55.2569

Session 3
2:09.3462 1:54.5856 1:59.8484 1:58.1716

Session 4
2:09.8472 1:59.7867 1:59.8871 1:55.2578

Session 5
2:31.3992 1:57.2229 1:56.3514 1:58.4974

At the end of the day, I was very happy with my new personal best of 1:54.5, it was very unexpected. RaceChrono now says that my TB is 1:53.3, but I'll leave that analysis for another time. Now, here is a comparison of my previous PB speed graph (red) to the day 1 best (yellow) and the day 2 best (green).


The gains were made up of:
  • Later braking into turn 1.
  • Faster through pretty much every corner.
  • Holding throttle flat through turn 3 and flatter through turns 8 and 12. 

And here's a comparison of my acceleration and deceleration around the track on day 1 (left) and day 2 (right). The more green the better.


Full results:

Kam's and my 350Z, as well as Canh's and Henry's Evo 9s

An immaculate 997 GT3, good to see it being put through its paces

Tyres
The Hankook Z221s wear incredibly slowly. They are hard compound and maybe I'm not getting enough heat into them. After each session they were only slightly gooey. These have now done 7 track days and they still look like this.


The Yokohama A050s have been good value. These medium compounds have now done 9 track days and are at end of life. The right has been almost worn bald due to the mostly left turns at Phillip Island. The left now has noticeably more tread than the right, but it also approaching bald.


Brakes
The Dixcel DAV rotors held up very nicely over the 2 days. They must have stayed cool because there is no sign of warping. The rotor surface is also smooth to the touch with no deep score marks. The brake ducting must be working even though it's still not currently ideally set up.

I can't wait for the next Phillip Island event!